|
It was a dark, stormy night when I ran into Jeff shuffling along the corridor carrying a big cardboard box.
"What you got there, Jeff?" I asked.
"Laser pointers, I got a gross of them from a bloke on on the market, gave me a great discount".
"Why so many?" I retorted.
"Ahh, well, I've got an idea, here, would you like one?" he replied.
So off home I went, after another late night in the lab, with a laser pointer.
The next day Jeff came gleefully up to me and showed me the results of his nights work. Half a dozen laser pointers with
the ends sawn off. "But why?" I asked.
"Well, you see, the spread laser beam you get when you take the front lens off is really good, we ought to be able to
make a hologram with it..."
And then Jeffs strange behaviour began to make a little sense...
How to adapt a laser pointer for holography
There aren't any tricks to this, it's really easy. Take your cheap two quid laser pointer, remove the batteries, and
saw the tip off. It's really that simple. Put the bateries back in and point it at the wall, and if you have successfully
removed the lens then you'll have a good, fairly even spread laser beam.
Now, you need to get a 4.5 volt (3LR12) battery and some wires with crocodile clips on them. Green and red, or at least
different colours, might help. Lets assume for a minute they're green and red.
Attach the green clip to the spring inside the laser pointer, and the red one to the outside case of the pointer (ye
olde electrical engineering trick). Then clip the green wire to the -ve terminal of the battery, and the red one to the +ve
terminal. Now when you push the button on the pointer you'll see that the laser is working, but now it's attached to a bigger
and more even power source (you'll need this to make holograms).
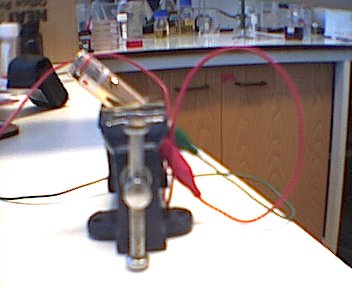
Get a little clamp to hold the laser in, and a clothes peg to hold the button down, and your optics are now (very nearly)
sorted.

|
| It really is this simple! |
The Hardware
Now, Jeff had gone a long way to convincing me that this was really such a simple system, but I still wasn't convinced.
You see, I'm used to making holograms in the lab on a really big optics bench that's solid, stable, and doesn't wobble. How
was Jeff going to replicate this in the home?
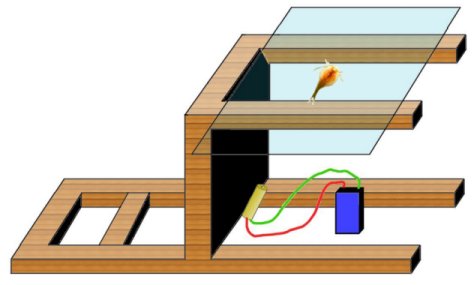
Using his signature belt and braces approach Jeff demonstrated his upturned chair principle. This is disarmingly simple;
you get a chair, and lay it on it's back. You get a strip of glass and put that on top of the legs of the chair, and you place
your holographic plate on top of that, with the object on top of it. The really cunning bit is that if it vibrates, it all
vibrates together, so you can get away with this bodge-it set up (as long as you don't jump up and down or knock it or something).
Obviously you line it up with the laser before putting the plate in place, and you have to do it all with green safelighting,
but really it's as simple as that.

|
| 'Chair' optical bench; note position of subject (on the glass), laser and battery. |
Safe lighting, Shutters, etc.
If you're reading this and are even vaguely interested in tryng it, you'll already realise that you need to do any work
with the holographic plates (even those made by methods on this site) with safe lighting on, and you'll need a shutter to
govern exposure time. I reccomend an aerosol can or tall glass tumbler with a bit of cardboard glued to it in such a
way as it can stick out over the top of the laser as a shutter. But these are all just details; the enthusiastic amateur,
boldly armed with the ideas on this page, can now go out into the world and build his own hologram studio for less than the
price of a vindaloo. Amazing, isn't it?
|

